Have you ever felt how everything feels softer and cozier under outdoor string lights?
Conversations feel happier, the space looks warmer, the environment becomes more relaxing, and even a quiet evening feels somewhat special.
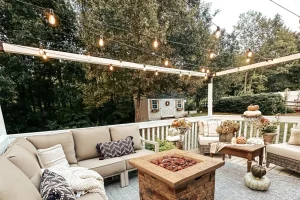
We believe that outdoor string lights are magical. They have some unique power that transforms your patios, decks, and backyards into a smooth, inviting space without overwhelming the design.
But here’s the truth—hanging outdoor string lights is not as easy as it sounds. It takes more than just a ladder and a couple of hooks. No, we don’t mean to scare you; we just want to inform you that without any proper planning and strategy, your lights can sag unevenly, and the overall setup can become unsafe.
So, how to do it safely without any professional help?
Today, we are going to walk you through everything you need to know about outdoor string light installation—without being exhausted.
Step-by-Step Process—How to Hang Outdoor String Lights?
How to install outdoor lights without getting any professional help has probably become the most important task on Texas homeowners’ to-do list. After all, who doesn’t want to cut costs, especially for home projects?
However, if you want to do it the right way, you need to follow the outdoor lighting hanging tips first so you can have a well-lit backyard for parties.
-
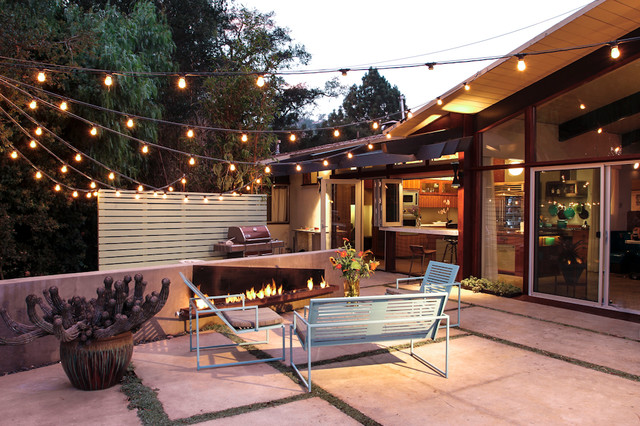
Step 1—Plan Your Layout First
This is the most important step that can’t be ignored. A few minutes of planning saves a lot of time and hassle.
So, before doing anything, walk your space in daylight to envision how the lights will run. Identify strong anchor points and locate your outdoor outlet. It’s also best to sketch a rough layout to have clear ideas in mind about how it should look.
Do not forget to choose a style, which could be:
- Straight line
- Zig-zag canopy
- Perimeter outline
- Center “starburst”
Make sure the style looks simple, as clean lines look most beautiful.
-
Step 2—Measure Everything Carefully
For a beautiful backyard string lights setup, it’s important to measure everything carefully before buying lights. Here are some quick tips to follow for beginners:
- Measure total span distance.
- Add 10–15% extra length.
- Plan for a slight sag.
- Confirm outlet reach.
Most patios just need 50-150 feet, depending on layout.
-
Step 3—Gather All the Tools
Having all the tools in hand makes everything easier. So, make sure you gather the tools before starting the project. You’ll need:
- Outdoor-rated string lights
- Outdoor extension cord
- Screw hooks or J-hooks
- Drill and drill bits
- Ladder
- Zip ties or clips
- Measuring tape
For long spans, you can even add steel guide wires and cable clamps. It’s better to use outdoor-related materials.
-
Step 4 – Install Your Anchor Points
Anchor point installation is another important step in the process. After all, your lights are only as strong as their supports.
For Wood:
- Drill pilot holes.
- Screw in hooks.
For Brick or Stucco:
- Use a masonry bit.
- Install anchors first.
For Trees:
- Use straps.
- Avoid screwing into bark.
Space all the hooks evenly for a balanced look.
-
Step 5—Add a Support Cable
Long spans always require some additional support. If your run is more than 15 feet, then it’s recommended to use a guide wire.
Why?
- Prevents sagging
- Reduces cord tension
- Extends light lifespan
Also, attach the cable tightly and clip the lights to the cable. Do not let cords carry their own weight.
-
Step 6—Hang the Lights
Now this is the fun part that most people enjoy. Hanging lights.
So, let’s start near the outlet and work outward.
For hanging lights, it’s best to follow these ideas:
- Hang one section at a time.
- Clip or tie every 2–3 feet.
- Leave gentle slack.
- Keep bulbs facing downward.
Make sure you do not pull the lights so tight that it causes tension, which ultimately leads to early failure.
-
Step 7—Plug in Safely
Electrical safety always matters. That’s why you test before final judgments.
Here are some safety tips to test:
- Use a GFCI outdoor outlet.
- Keep plugs off the ground.
- Use weatherproof covers.
- Avoid overloading circuits.
- Follow manufacturer limits.
If you are not sure, it’s better to consult an electrician or a professional.
-
Step 8—Weatherproof Everything
We all know that outdoor lights face harsh weather, like wind and rain. So, protecting your setup should be your top priority. Here’s how you can protect it:
- Use outdoor-rated lights only.
- Secure loose cords.
- Tighten clips before storms.
- Inspect each season.
Remember, wind is the biggest enemy of your lights, so protect them from wind by following all the protocols.
Avoid These Common Mistakes
After mentioning the steps about how to connect string lights, it’s time to highlight some common mistakes so you can handle the process more smoothly.
-
Don’t pull lights too tight
Tension causes premature wear and breakage.
-
Don’t skip the support cable
Especially on long spans, cords should never carry their own weight.
-
Avoid indoor-only light strings
Outside—they’re not built for weather.
When to Consider Professional Help to Hang Patio String Lights?
We know DIY tasks work well for patios and decks, but you can consider help if:
- You’re mounting to the rooflines
- You need electrical upgrades
- You want permanent lighting
- You’re installing across large areas
That’s when you can consult with the professionals of Trimlight DFW that specialize in clean and low-maintenance patio lighting and outperform temporary string lights setup.
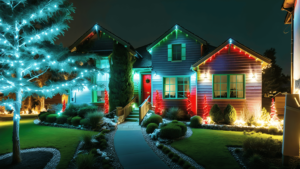
Best for All Occasions, Literally!
Outdoor string lights are ideal for almost every occasion. Whether it’s a Valentine Day, Mother’s Day, 4th of July event, or Christmas, you can simply consider the outdoor string lights setup to elevate the charm of your outdoors—without spending hours and money.
Above all, you can easily control them with a single tap on your phone. Install the app on your phone, create your account, and explore all the features, where you can even change the patterns and colors based on your occasion.
Final Thoughts—How to Connect String Lights Together?
Connecting string lights together is simple, but it needs to be done correctly to ensure safety and long-term performance. Always check the manufacturer’s guidelines to see how many strands can be safely connected end-to-end, and never exceed that limit.
Moreover, keep connections elevated and away from moisture, and test the entire run before securing it permanently. When done properly, your lights will glow evenly and reliably.
And if you’d rather skip the trial and error, Trimlight DFW can help you achieve a clean, professional, permanent lighting solution that eliminates the hassle.