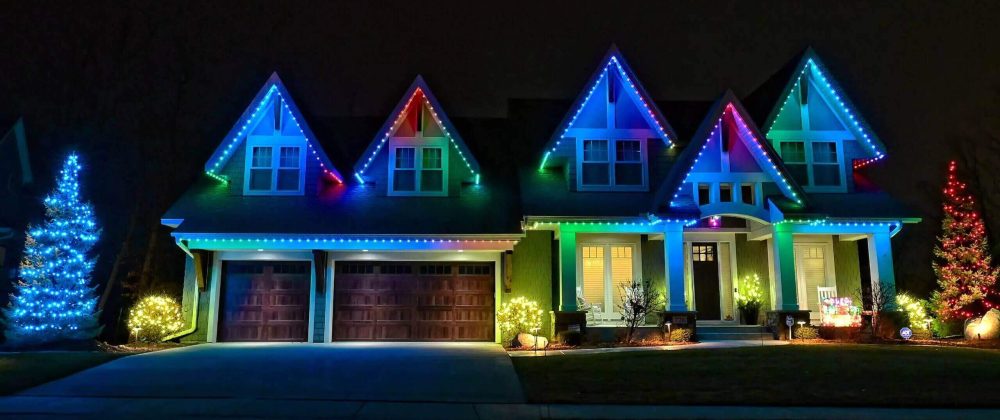
Adding patio lights to your outdoor space in Austin can transform it into a cozy and inviting retreat where you can relax, entertain, and enjoy the beauty of warm Texas evenings. Whether you’re hosting a barbecue with friends or enjoying a quiet night under the stars, patio lights can enhance the ambiance and create a magical atmosphere.
In this comprehensive guide, we’ll walk you through everything you need to know about installing patio lights Austin, from planning and preparation to execution and maintenance, so you can create the perfect outdoor oasis for your home.
Planning Your Patio Lighting Design:
Before you start installing patio lights, it’s essential to have a clear plan in place. Begin by assessing your outdoor space and determining where you want to install lights. Consider the layout of your patio, the location of seating areas, and any architectural features you want to highlight.
Think about the ambiance you want to create and how different lighting elements can help you achieve your vision. Sketch out a rough lighting design, taking into account the type of lights you’ll use and how they’ll be arranged.
Choosing the Right Type of Patio Lights:
There are several types of patio lighting Austin to choose from, each with its own unique features and benefits. String lights are a popular choice for their versatility and ease of installation. They can be draped across trees, pergolas, or strung along fences to create a soft, inviting glow. Lanterns are another option, adding a touch of elegance and charm to your outdoor space.
Pathway lights, floodlights, and spotlights can be used to illuminate specific areas or highlight landscaping features. Consider your space and lighting needs when choosing the right type of patio lights for your installation.
Gathering Your Materials and Tools:
Once you’ve planned your patio lighting design and chosen the right type of lights, it’s time to gather your materials and tools. Depending on the type of lights you’re installing, you may need items such as string lights, lanterns, stakes, extension cords, hooks, and mounting hardware. Make sure you have all the necessary tools on hand, including a ladder, drill, screws, and wire cutters. Having everything you need ready before you start will streamline the installation process and ensure a smooth and successful outcome.
Preparing Your Outdoor Space:
Before you begin installing patio lights, take some time to prepare your outdoor space. Clear away any debris or clutter from your patio area, and trim back any overhanging branches or foliage that could obstruct your lights. Check your electrical outlets to ensure they are in good working condition and can handle the load of your lights. If you’re using string lights, measure the length of your patio and calculate how many strands you’ll need to cover the entire area.
Installing Your Patio Lights:
With your materials and tools assembled and your outdoor space prepared, it’s time to start installing your patio lights. Begin by installing any necessary hardware, such as hooks or mounting brackets, to secure your lights in place. If you’re using string lights, start by hanging them along the perimeter of your patio, using hooks or zip ties to secure them to trees, fences, or other structures.
For lanterns or pathway lights, simply stake them into the ground or hang them from hooks or shepherd’s hooks. Take your time and work carefully to ensure that your lights are installed securely and evenly.
Connecting Your Lights to Power:
Once your patio lights are installed, it’s time to connect them to power. If you’re using string lights, plug them into an outdoor-rated extension cord and then into a nearby electrical outlet. Be sure to use extension cords and outlets that are rated for outdoor use to prevent damage or electrical hazards. If you’re using solar-powered lights, place the solar panels in a sunny location where they can absorb plenty of sunlight during the day. Follow the manufacturer’s instructions for setting up and activating your solar lights.
Testing Your Lights and Making Adjustments:
After connecting your lights to power, take a moment to test them and make any necessary adjustments. Turn on your lights and walk around your patio to ensure that all of your lights are working properly and that they provide the desired level of illumination.
Make any adjustments to the placement or positioning of your lights as needed to achieve the desired effect. Consider adding dimmer switches or smart lighting controls to your installation to give you more flexibility and control over your patio lights.
Adding Finishing Touches:
With your patio lights installed and working perfectly, it’s time to add some finishing touches to complete the look. Consider adding decorative elements such as potted plants, outdoor rugs, cushions, and throw pillows to create a cozy and inviting atmosphere. Hang curtains or drapes to add privacy and shade, or install a canopy or pergola to provide shelter and create a sense of intimacy. Incorporate outdoor furniture, such as tables, chairs, and lounges, to create comfortable seating areas where you can relax and enjoy your newly illuminated patio.
Maintaining Your Patio Lights:
To ensure that your patio lights continue to look and perform their best, it’s essential to maintain them properly. Regularly inspect your lights for any signs of damage or wear, such as broken bulbs, frayed wires, or loose connections, and make any necessary repairs or replacements.
Keep your lights clean by wiping them down with a damp cloth or using a mild detergent and water solution. Trim back any overgrown vegetation that could obstruct your lights or pose a fire hazard. By taking care of your patio lights, you can extend their lifespan and keep your outdoor space looking beautiful for years to come.
Enjoying Your Illuminated Outdoor Space:
Finally, take a moment to step back and admire your handiwork. Your newly installed patio lights have transformed your outdoor space into a cozy and inviting oasis where you can relax, entertain, and make memories with friends and family.
Whether you’re hosting a dinner party, enjoying a quiet evening under the stars, or simply soaking up the beauty of your illuminated patio, take the time to appreciate the ambiance and tranquility that your lights have created. With proper installation and maintenance, your patio lights will continue to enhance your outdoor living experience for years to come.
Conclusion:
Installing Austin patio lighting in your home is a great way to enhance your outdoor living space and create a cozy and inviting ambiance for relaxing, entertaining, and enjoying the beauty of warm Texas evenings. By following this ultimate guide to installing patio lights, you can transform your outdoor space into a magical oasis that you and your loved ones will enjoy for years to come.
From planning and preparation to execution and maintenance, taking the time to install patio lights properly will ensure that your outdoor space is beautifully illuminated and ready for any occasion
You May Also Like:Transform Your Patio with These Stylish Lighting Trends


